Blogs

Seeds and Cuttings: Growing Rosemary at Home with Speed and Success
Welcome, green thumbs and aspiring plant enthusiasts! Look no further if you’ve ever dreamed of cultivating your fragrant herb garden. In this comprehensive guide, we’ll delve into the art of growing rosemary at home and take the fast track to success.
Rosemary, with its delightful fragrance and versatile uses in the kitchen, is a favourite among gardeners. The good news? You don’t need a green thumb of mythical proportions to grow this aromatic herb successfully. Whether you’re starting from seeds or cuttings, we’ve covered you with practical tips, expert advice, and a step-by-step roadmap to transform your home into a rosemary haven.
So, grab your gardening gloves, unleash your inner horticulturist, and embark on a journey to sow and thrive with rosemary!
The Beauty of Rosemary

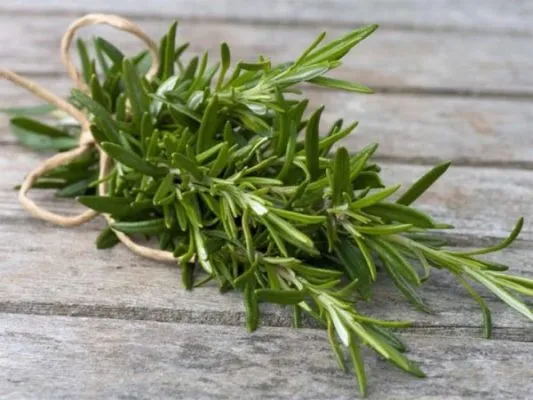
Rosemary (Rosmarinus officinalis) is not just an herb; it’s a fragrant symphony of flavour and aroma that has graced gardens and kitchens for centuries. Before we delve into the practical aspects of growing this remarkable herb, let’s take a moment to appreciate its beauty and versatility.
Characteristics:
Rosemary is an evergreen shrub with needle-like leaves that release an invigorating pine-like fragrance when crushed. Its slender, woody stems bear tiny, blue, or purple flowers, adding a touch of elegance to its appearance. The beauty of rosemary extends beyond aesthetics; its leaves are packed with essential oils, making it a powerhouse in both the culinary and medicinal worlds.
Also Read This :Indoor Zen: Stylish and Stress-Free Hanging Succulents for Any Space
Historical Significance:
Throughout history, rosemary has held a special place in various cultures. Ancient Greeks and Romans believed it symbolized loyalty, love, and remembrance. In the Middle Ages, it was associated with memory enhancement, earning it the reputation of the “herb of remembrance.” Today, rosemary continues to be a cherished herb, celebrated not only for its historical significance but also for its culinary magic.
Versatility in the Kitchen:
One of the enchanting aspects of rosemary is its versatility in the kitchen. From roasted meats to savoury bread and herb-infused oils, rosemary adds a distinct and delightful flavour to a wide array of dishes. Its aromatic qualities can transform an ordinary meal into a culinary masterpiece.
Also Read This :Tomato Transplanting Tips: A Guide to Timing and Techniques for Successful Gardening in Both Beds and Containers
Preparing Your Workspace
Now that we’ve explored the allure of rosemary, it’s time to roll up our sleeves and set the stage for a successful cultivation journey. Preparing the proper workspace is crucial for ensuring your rosemary plants thrive. Let’s break down the essential elements:
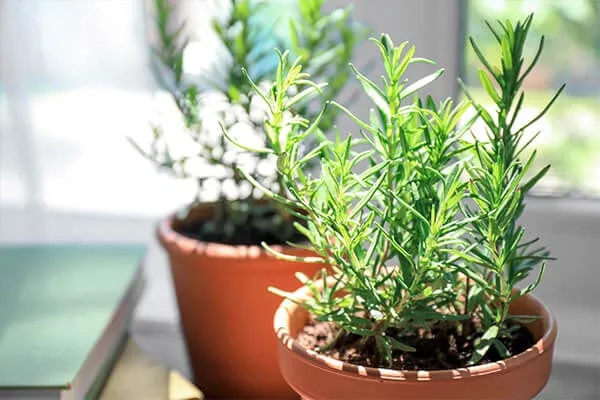
Selecting Containers:
The first step is choosing suitable containers for your rosemary. Opt for well-draining pots or containers to prevent waterlogging, as rosemary dislikes soggy roots. Terra cotta or clay pots are excellent choices, as they allow excess moisture to evaporate. Ensure your containers have drainage holes to maintain the proper moisture balance.
Also Read This :Understanding Factors Leading to Slow Seedling Growth: Common Causes Explored
Choosing the Right Soil:
Rosemary prefers well-draining, sandy soil with a slightly acidic to neutral pH. You can purchase a pre-made potting mix designed for herbs or create your own by combining garden soil with sand or perlite. This provides the ideal conditions for healthy root development and prevents root rot.
Sunlight Requirements:
Rosemary thrives in full sunlight, so choose a location that receives at least 6-8 hours of direct sunlight daily. If you’re growing rosemary indoors, place your pots near a south-facing window where they can bask in the sunlight. Adequate sunlight fuels photosynthesis and enhances the plant’s aromatic oils, intensifying its fragrance.
Also Read This :Transplanting Seedlings: Knowing When and How to Move from Seed Tray to Garden or Containers
Temperature Considerations:
Rosemary prefers a warm and dry climate. Aim for a temperature range of 65-80°F (18-27°C) for optimal growth. If you’re growing rosemary outdoors, be mindful of frost; in a colder climate, consider bringing your potted rosemary indoors during winter.
Growing Rosemary from Seeds
Now that your workspace is primed and ready let’s explore the rewarding process of growing rosemary from seeds. While it requires patience, nurturing a plant from its earliest stages is genuinely fulfilling. Here’s your step-by-step guide:
Selecting Quality Seeds:
Begin with high-quality rosemary seeds. You can find these at local nurseries or reputable online seed suppliers. Look for varieties that suit your preferences, whether the classic upright rosemary or a creeping variety for ground cover.
Also Read This :Effortless Elegance: Low-Maintenance Succulents Perfect for Indoor Gardens
Seed Starting Mix:
Use a seed starting mix for germination. This mix is lighter and finer than regular potting soil, providing an ideal environment for the tiny rosemary seeds to sprout. Moisten the mix before filling your seed trays or small pots.
Sowing Seeds:
Gently press the seeds into the soil’s surface, ensuring they are in good contact with the mix. Rosemary seeds are tiny, so a light touch is crucial. Cover them with a thin layer of the seed starting mix. Mist the surface with water to settle the soil.
Cover and Provide Warmth:
Cover the trays or pots with a plastic dome or wrap to create a humid environment. Place them in a warm location, maintaining a temperature between 70-75°F (21-24°C). A seedling heat mat can be beneficial for consistent warmth.
Also Read This :Know how to grow succulent plants in your home garden? Here are the tips
Be Patient and Water Wisely:
Rosemary seeds can take anywhere from 14 to 21 days to germinate. Keep the soil consistently moist but not soggy. Once the seedlings have several sets of leaves, you can transplant them into larger containers, allowing more room for their root systems to develop.
Transplanting and Thinning:
Carefully transplant the seedlings into individual pots, choosing the strongest and healthiest ones. Thinning is essential to ensure each plant has sufficient space and resources for robust growth.
Also Read This :Hibiscus Happiness: A Guide to Caring for Your Plant
Propagating Rosemary from Cuttings
Propagating rosemary from cuttings is a fantastic way to accelerate the process, yielding mature plants faster than growing from seeds. This method also ensures you can replicate the characteristics of a parent plant you admire. Let’s dive into the steps of propagating rosemary from cuttings:
Selecting Healthy Cuttings:
Choose a healthy and established rosemary plant for your cuttings. Select stems free from diseases and pests and opt for semi-hardwood cuttings, typically taken in late spring to early summer. These cuttings have partially matured, striking a balance between flexibility and firmness.
Cutting Preparation:
With clean, sharp scissors or pruning shears, take 4-6 inch (10-15 cm) cuttings from the tips of the rosemary stems. Strip away the leaves from the lower one-third to one-half of each cutting, leaving a clean stem for planting.
Also Read This :Meet the Green Guardians – Houseplants live for Over a Century
Rooting Hormone (Optional):
While not strictly necessary, dipping the cut end of each stem in a rooting hormone can encourage quicker root development. This step is particularly beneficial if you want to boost the success rate of your cuttings.
Planting the Cuttings:
Insert the prepared cuttings into a well-draining rooting medium. This could be a mix of perlite, vermiculite, or a specialized rooting medium. Ensure at least two nodes (the points where leaves were attached) are buried in the medium. Water the medium lightly.
Creating a Humid Environment:
Enclose the cuttings and their containers in a plastic bag or cover them with a plastic dome to create a humid environment. This encourages the development of roots. Place the cuttings in a location with bright, indirect light.
Also Read This : From Feng Shui to Oxygen Boost: The Multi-Faceted Benefits of Snake Plants
Patience and Monitoring:
Root development typically takes a few weeks. Be patient and monitor the cuttings regularly. Once you observe sufficient root growth, transplant them into individual pots or your prepared garden soil.
Also Read This :Easy and Budget-Friendly Herb Propagation from Cuttings
As we conclude our journey into growing rosemary at home from seeds and cuttings, reflecting on the remarkable transformation from tiny seeds or cuttings to aromatic, thriving plants is gratifying. Your commitment to providing the right conditions, from selecting quality seeds or cuttings to nurturing your garden, has borne fruit – or, in this case, fragrant leaves.
Also Read This :Rosemary Revelations: Unveiling the Secrets to Successful Care and Cultivation