Blogs
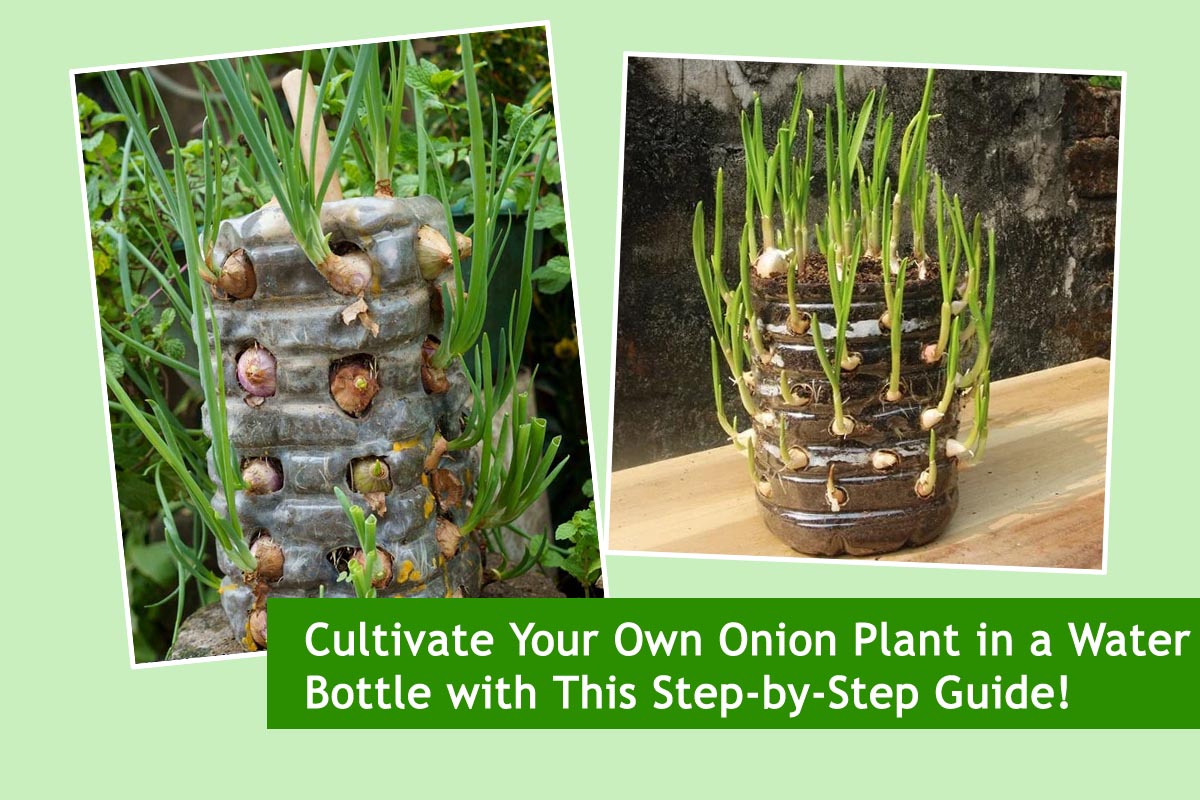
Cultivate Your Own Onion Plant in a Water Bottle with This Step-by-Step Guide!
Are you interested in growing your own vegetables but don’t have a lot of outdoor space? Or perhaps you want to embark on a fun and sustainable gardening project with minimal resources? Look no further! In this guide, we’ll walk you through the simple steps of growing an onion plant right in the comfort of your home using just a water bottle. Not only is this method eco-friendly, but it’s also a fantastic way to witness the magic of plant growth up close. Let’s dive in!
Why Grow Onions in a Water Bottle?
Before we jump into the process, let’s quickly explore why growing onions in a water bottle is such a fantastic idea:
Space-Saving:
If you’re short on outdoor space or live in an apartment, this method allows you to cultivate onions indoors without needing a garden bed.
Cost-Effective:
Utilizing a recycled water bottle as a makeshift planter means you won’t have to invest in expensive gardening equipment.
Educational:
This project provides a hands-on learning experience for both children and adults, teaching valuable lessons about plant growth and sustainability.
Year-Round Growth:
With the right conditions, you can grow onions indoors throughout the year, ensuring a constant supply of fresh produce.
Also Read This :Revive Your Dying Plant: The Miracle of Free Fertilizer That Sparks Blooms!
Now that you understand the benefits, let’s move on to the step-by-step process.

Step 1: Gather Your Materials
First things first, gather the necessary materials:
- One empty and clean plastic water bottle (preferably with a wide opening)
- Onion bulbs (you can use store-bought onions)
- Sharp knife or scissors
- Water
Step 2: Prepare the Water Bottle
Start by cutting the water bottle in half horizontally. You’ll only need the bottom half for planting, so set the top half aside for recycling. Make sure to rinse the bottom half thoroughly to remove any residue.
Also Read This :Mastering the Art of Watering: Keeping Your Garden Green Year-Round
Step 3: Prepare the Onion Bulbs
Take your onion bulbs and carefully peel off the outer layers until you expose the roots at the bottom. Trim any excess roots, leaving about half an inch attached to the bulb. This will encourage healthy growth.
Step 4: Plant the Onions
Fill the bottom half of the water bottle with water, ensuring that it’s deep enough to submerge the roots of the onion bulbs. Place the bulbs in the water, root-side down, making sure they are fully submerged. You can plant multiple bulbs in one water bottle, spacing them out evenly.

Also Read This :7 Bedroom-Friendly Plants to Transform Your Space
Step 5: Provide Adequate Care
Place the water bottle in a sunny spot where it can receive plenty of natural light. Change the water every few days to keep it fresh and prevent stagnation. Over time, you’ll notice the roots growing longer and white shoots emerging from the top of the bulbs. This is a sign that your onions are thriving!
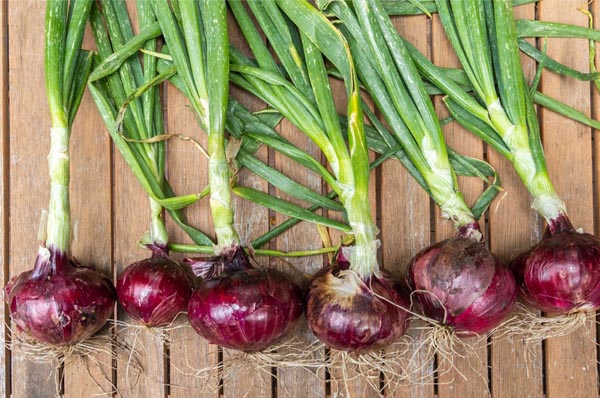
Step 6: Harvest Your Onions
As your onions continue to grow, you can harvest them at any stage depending on your preference. For green onions, you can start harvesting when the shoots reach a desirable height. If you prefer fully mature onions, allow them to grow until the bulbs are large and firm.
Step 7: Enjoy Your Homegrown Onions!
Once harvested, rinse your onions thoroughly and use them in your favorite recipes. There’s nothing quite like the satisfaction of cooking with homegrown produce!
Also Read This :The Science Behind Planting Tomatoes with Coffee Grounds for Rapid Growth
Growing onions in a water bottle is a simple yet rewarding gardening project that anyone can enjoy. Not only does it offer a sustainable way to cultivate fresh produce at home, but it also serves as a valuable learning experience for all ages. So why wait? Grab a water bottle and some onion bulbs, and embark on your indoor gardening adventure today!