Blogs

3 Method to Grow Shasta Daisy: A Beginner’s Guide
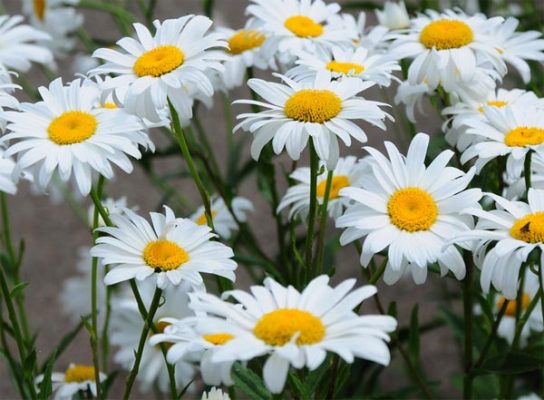
Embarking on the journey of growing your own Shasta Daisies is a delightful venture into gardening. These perennial beauties, with their classic white petals and golden-yellow centres, bring timeless elegance to any garden. If you’re a beginner eager to cultivate your patch of floral paradise, this 3 Method to Grow Shasta Daisy guide is tailored just for you.
We’ll take you through the essential steps, providing easy-to-follow instructions and tips to empower you to nurture these resilient flowers, from tiny seeds to a thriving garden display. Whether you have a green thumb or you’re taking your first steps into the world of gardening, this guide is designed to make the process of growing Shasta Daisies a joyful and prosperous experience.
Also Read This :Blooms in the Chill: Flowers to Plant in Texas Fall and Winter, USA?
How to Grow Shasta Daisies From Seed
With their timeless beauty, Shasta Daisies add a touch of classic elegance to any garden. Growing these charming perennials from seed is a rewarding journey that allows you to witness the entire life cycle of these blossoms. In this guide, we’ll explore how to cultivate Shasta Daisies from seed, transforming your garden into a haven of white and gold blooms.
Choosing the Right Seeds
Begin your Shasta Daisy journey by choosing high-quality seeds. Opt for reputable seed suppliers or reliable garden centres to ensure the viability and quality of the seeds.
When to Plant
Shasta Daisies can be started indoors 6-8 weeks before the last expected frost in your area. Alternatively, sow seeds directly into the garden in early spring or fall.
Also Read This :Top 10 Proven Methods for Radish Cultivation
Preparing the Soil
Shasta Daisies prefer well-draining soil. Prepare a seedbed with loose, fertile soil enriched with organic matter. Ensure the soil pH is between 6.0 and 7.0 for optimal growth.
Sowing the Seeds
Indoor Sowing
- If starting indoors, sow the seeds in trays or pots filled with seed-starting mix.
- Press the seeds lightly into the soil, as they require light to germinate.
- Keep the soil consistently moist.
Outdoor Sowing
Scatter the seeds over the prepared seedbed and lightly press them into the soil for direct outdoor sowing. Water gently to settle the seeds.
Also Read This :From Seed to Harvest: Growing Onions Simplified
Germination and Transplanting
Shasta Daisy seeds typically germinate for 10-21 days. Once seedlings have two sets of true leaves, transplant them into individual pots or a well-prepared garden bed.
Providing Adequate Sunlight
Shasta Daisies thrive in full sunlight. Ensure your seedlings receive at least 6 hours of direct sunlight daily. If starting indoors, gradually acclimate seedlings to outdoor conditions before transplanting.
Watering and Feeding
Keep the soil consistently moist but not soggy. Once established, Shasta Daisies are relatively drought-tolerant—water at the base to prevent foliage diseases. Fertilize young plants with a balanced, water-soluble fertilizer every 4-6 weeks during the growing season. Once established, they require minimal feeding.
Also Read This :Turn Your Home Into A Paradise With These Ornamental Plants
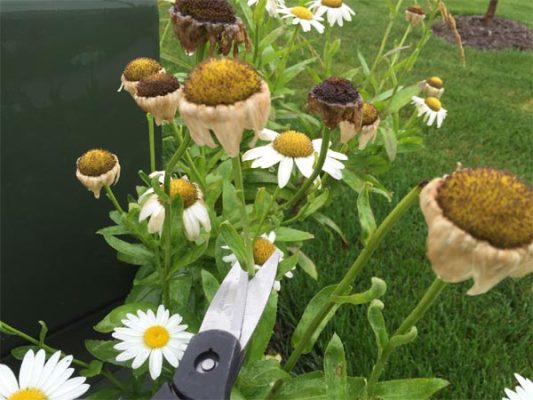
Pruning for Bushier Growth
Pinch back the growing tips when the plants are 6-8 inches tall to encourage bushier growth. Repeat this process if the plants become leggy during the growing season.
Dealing with Pests and Diseases
Look for common garden pests like aphids or mites. Address any issues promptly using natural remedies or insecticidal soap. Ensure good air circulation to prevent fungal diseases.
Enjoying the Blooms
Shasta Daisies typically bloom in late spring to early summer. As the first delicate blooms unfold, you’ll witness the fruits of your labour, and your garden will be adorned with the classic beauty of Shasta Daisies.
Also Read This :When and How: The Ultimate Succulent Repotting Guide
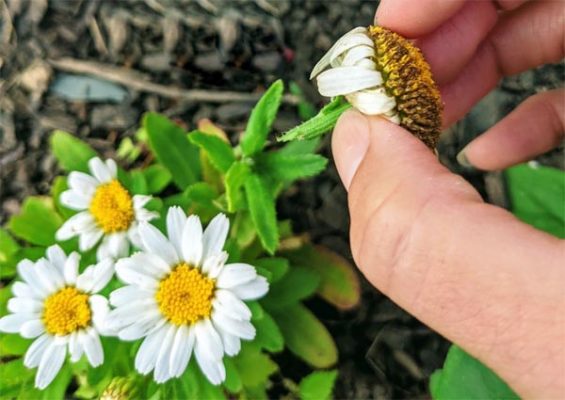
Propagating Shasta Daisies from Stem Cuttings
This guide focuses on one enchanting method of Shasta Daisy propagation: stem cuttings. With some know-how and patience, you can turn a healthy stem into a blooming bouquet. Join us as we explore the intricacies of propagating Shasta Daisies from stem cuttings, unlocking the secrets to cultivating your flourishing garden of perennial charm. Get ready to witness the transformation from a humble cutting to a radiant display of nature’s elegance in your backyard. Let’s dive into the delightful world of Shasta Daisy propagation!
Best Time for Cuttings
Take stem cuttings when the plant is actively growing in late spring to early summer. This method is suitable for both mature and younger Shasta Daisies.
Also Read This :Blossoming Health: The Medicinal Magic of Flower Power Blooms
Propagating Shasta Daisies from Stem Cuttings Steps:
- Select a healthy, non-flowering stem with at least two pairs of leaves.
- Cut the stem below a leaf node using clean, sharp scissors or pruning shears.
- Remove the lower set of leaves, leaving only the top pair.
- Dip the cut end in rooting hormone (optional) and plant the cutting in a well-draining rooting medium.
- Keep the cuttings in a warm, humid environment until roots develop. Once rooted, transplant them into individual pots or directly into the garden.
Also Read This :Leafy Elegance: Transform Your Space with These Amazing Pothos Curtain Ideas
Propagating Shasta Daisies from Division
In gardening, a particular enchantment comes with watching a single Shasta Daisy transform into many blooms, gracing your garden with timeless elegance. Division is a straightforward and effective way to multiply these perennial beauties among the various propagation methods. If you’re ready to witness the magic of turning one plant into many, this guide on propagating Shasta Daisies through division is your ticket to a garden filled with floral abundance.
Also Read This :How Long Do the Longest Blooming Flowers Really Last?
Join us as we explore the art of division, a technique particularly suitable for mature Shasta Daisy plants. From understanding the best time to divide to the step-by-step process of separating and transplanting, this guide is your roadmap to successfully propagating Shasta Daisies through division. Let’s embark on this journey of horticultural multiplication and elevate your garden to new heights of beauty.
Also Read This :Guardians of Shami: Items to Keep Away from Your Sacred Plant
Best Time to Divide
Spring or early fall is the ideal time to divide Shasta Daisies. This method is suitable for mature plants growing for a few years.

Propagating Shasta Daisies from Division Steps
- Dig up the mature Shasta Daisy plant, ensuring you get as much of the root system as possible.
- Gently separate the clumps into smaller divisions, making sure each division has a portion of the roots and foliage.
- Replant the divisions in well-prepared soil, water thoroughly, and keep the soil consistently moist until the new plants establish themselves.
Also Read This :Best Indoor Bonsai Trees to Elevate Your Home Decor
Propagating Shasta Daisies is a gratifying process that allows you to share the beauty of these timeless blooms throughout your garden or with fellow gardening enthusiasts. Whether you choose division, stem cuttings, or seed propagation, each method promises to transform a single Shasta Daisy into a flourishing testament to nature’s resilience and beauty. Happy propagating!
Also Read This :Common Shasta Daisy Problems and How to Solve Them